
Setting up takes a few minutes and one on-chain transaction. Finishing it properly takes a conversation with your heir.
Before you start
- A wallet, backed up. See backing up your recovery phrase.
- A small amount of SOL for fees.
- Your heir's Solana address, from them directly — not from a message you did not verify.
- Their agreement to install the app and sign an acceptance.
The steps
- 01
Open Inheritance and start setup
The app checks whether an inheritance account already exists for your address. If one does, you are editing rather than creating.
- 02
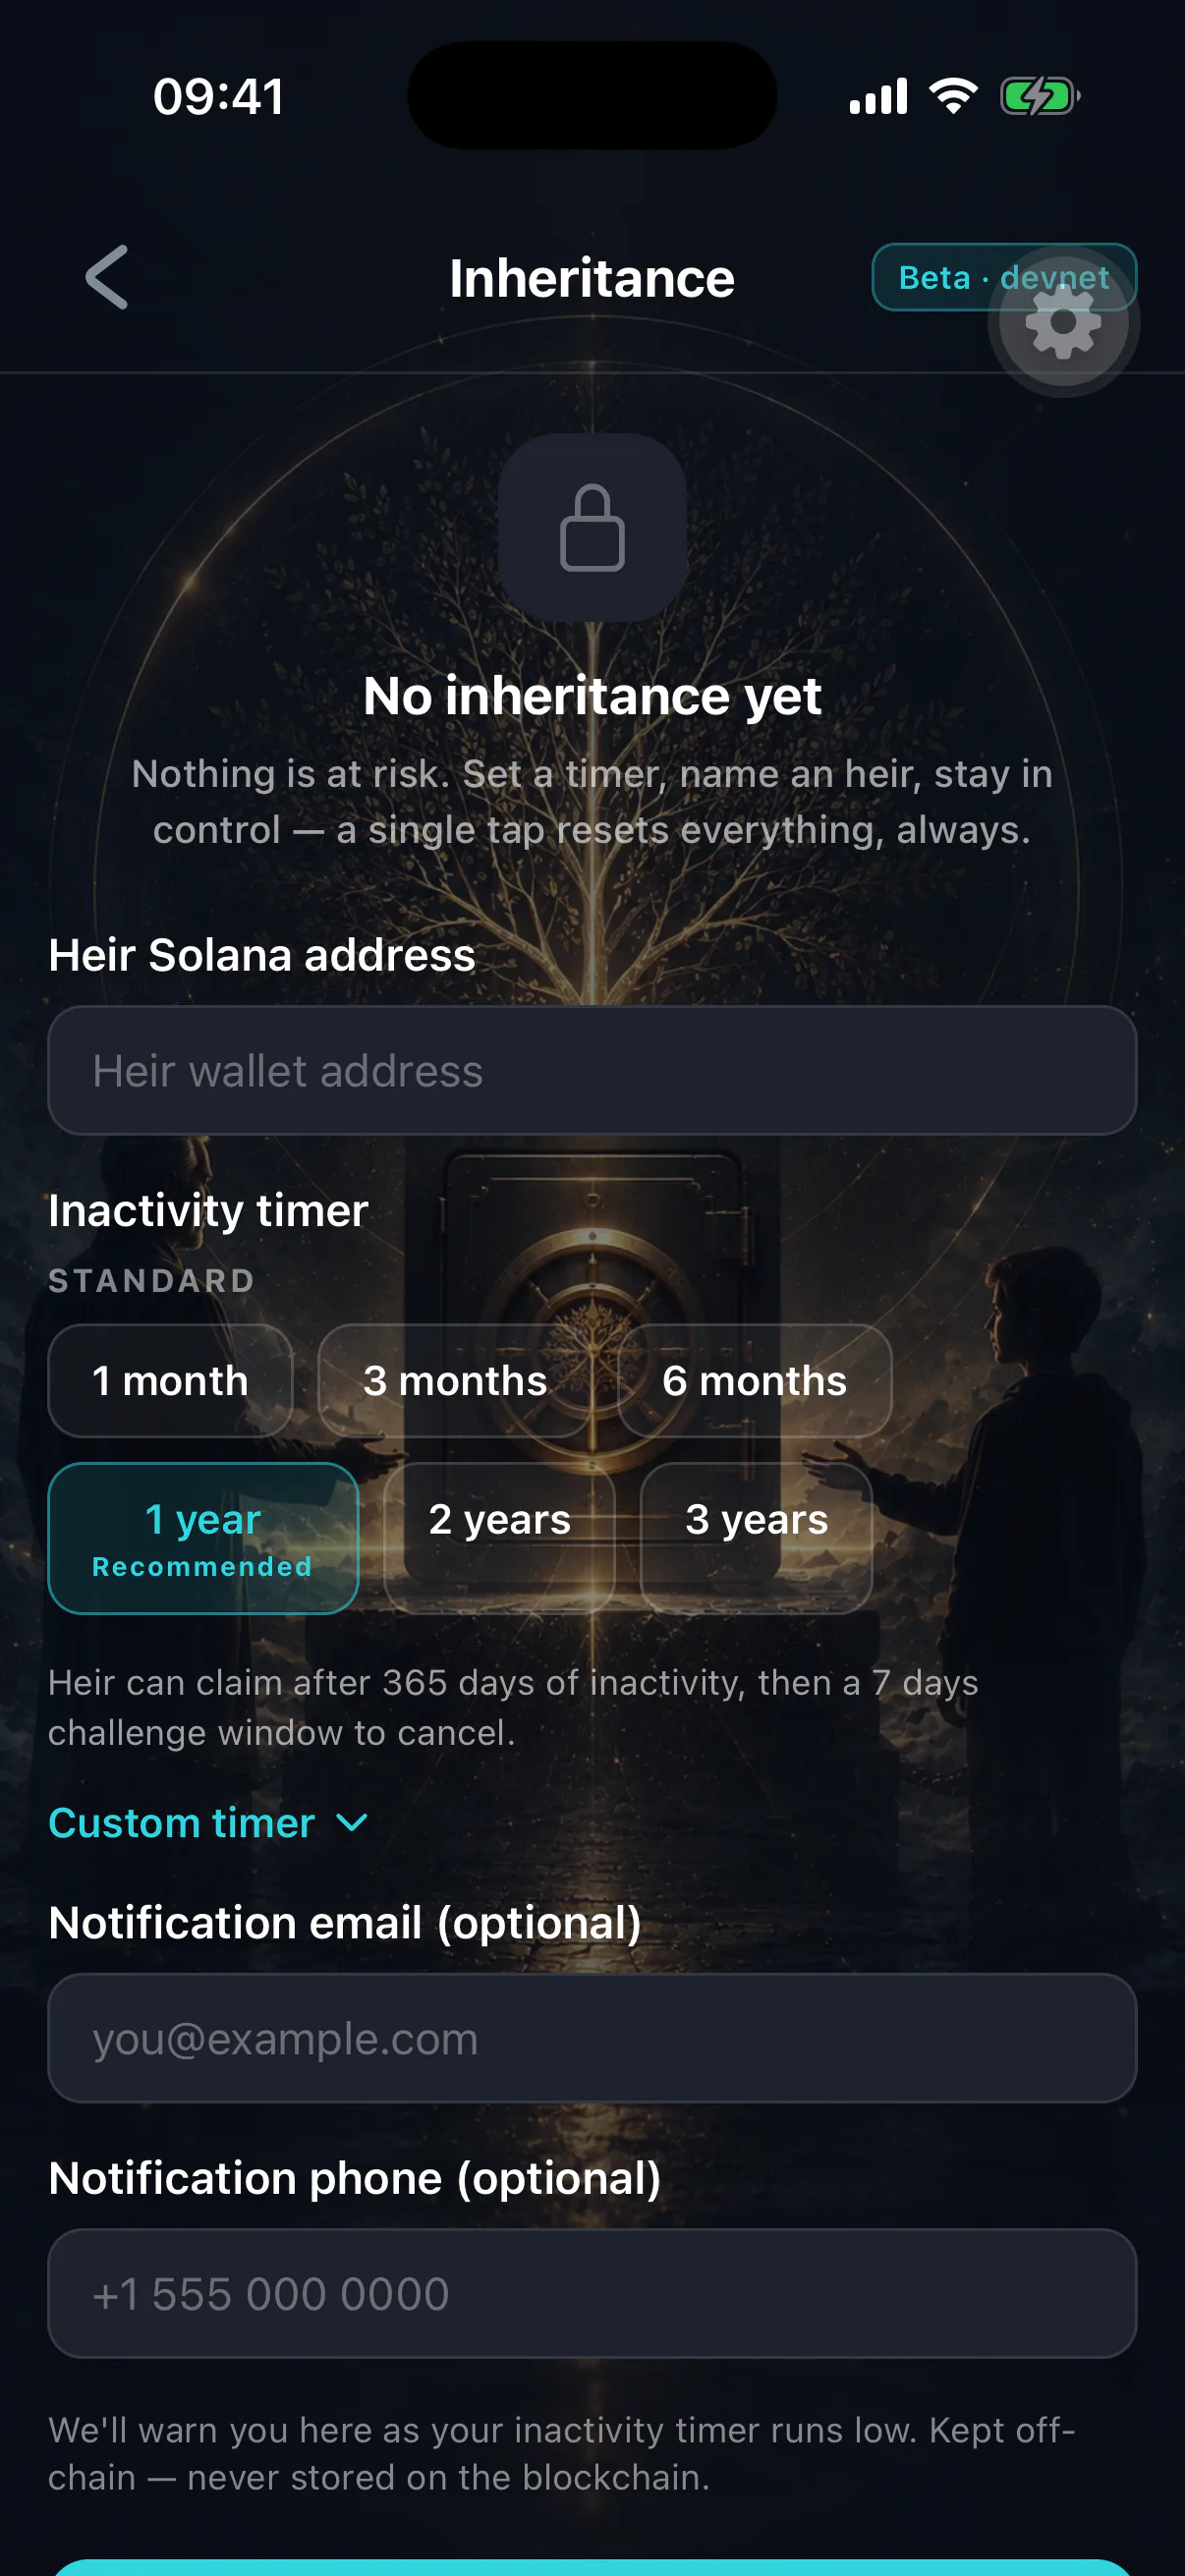
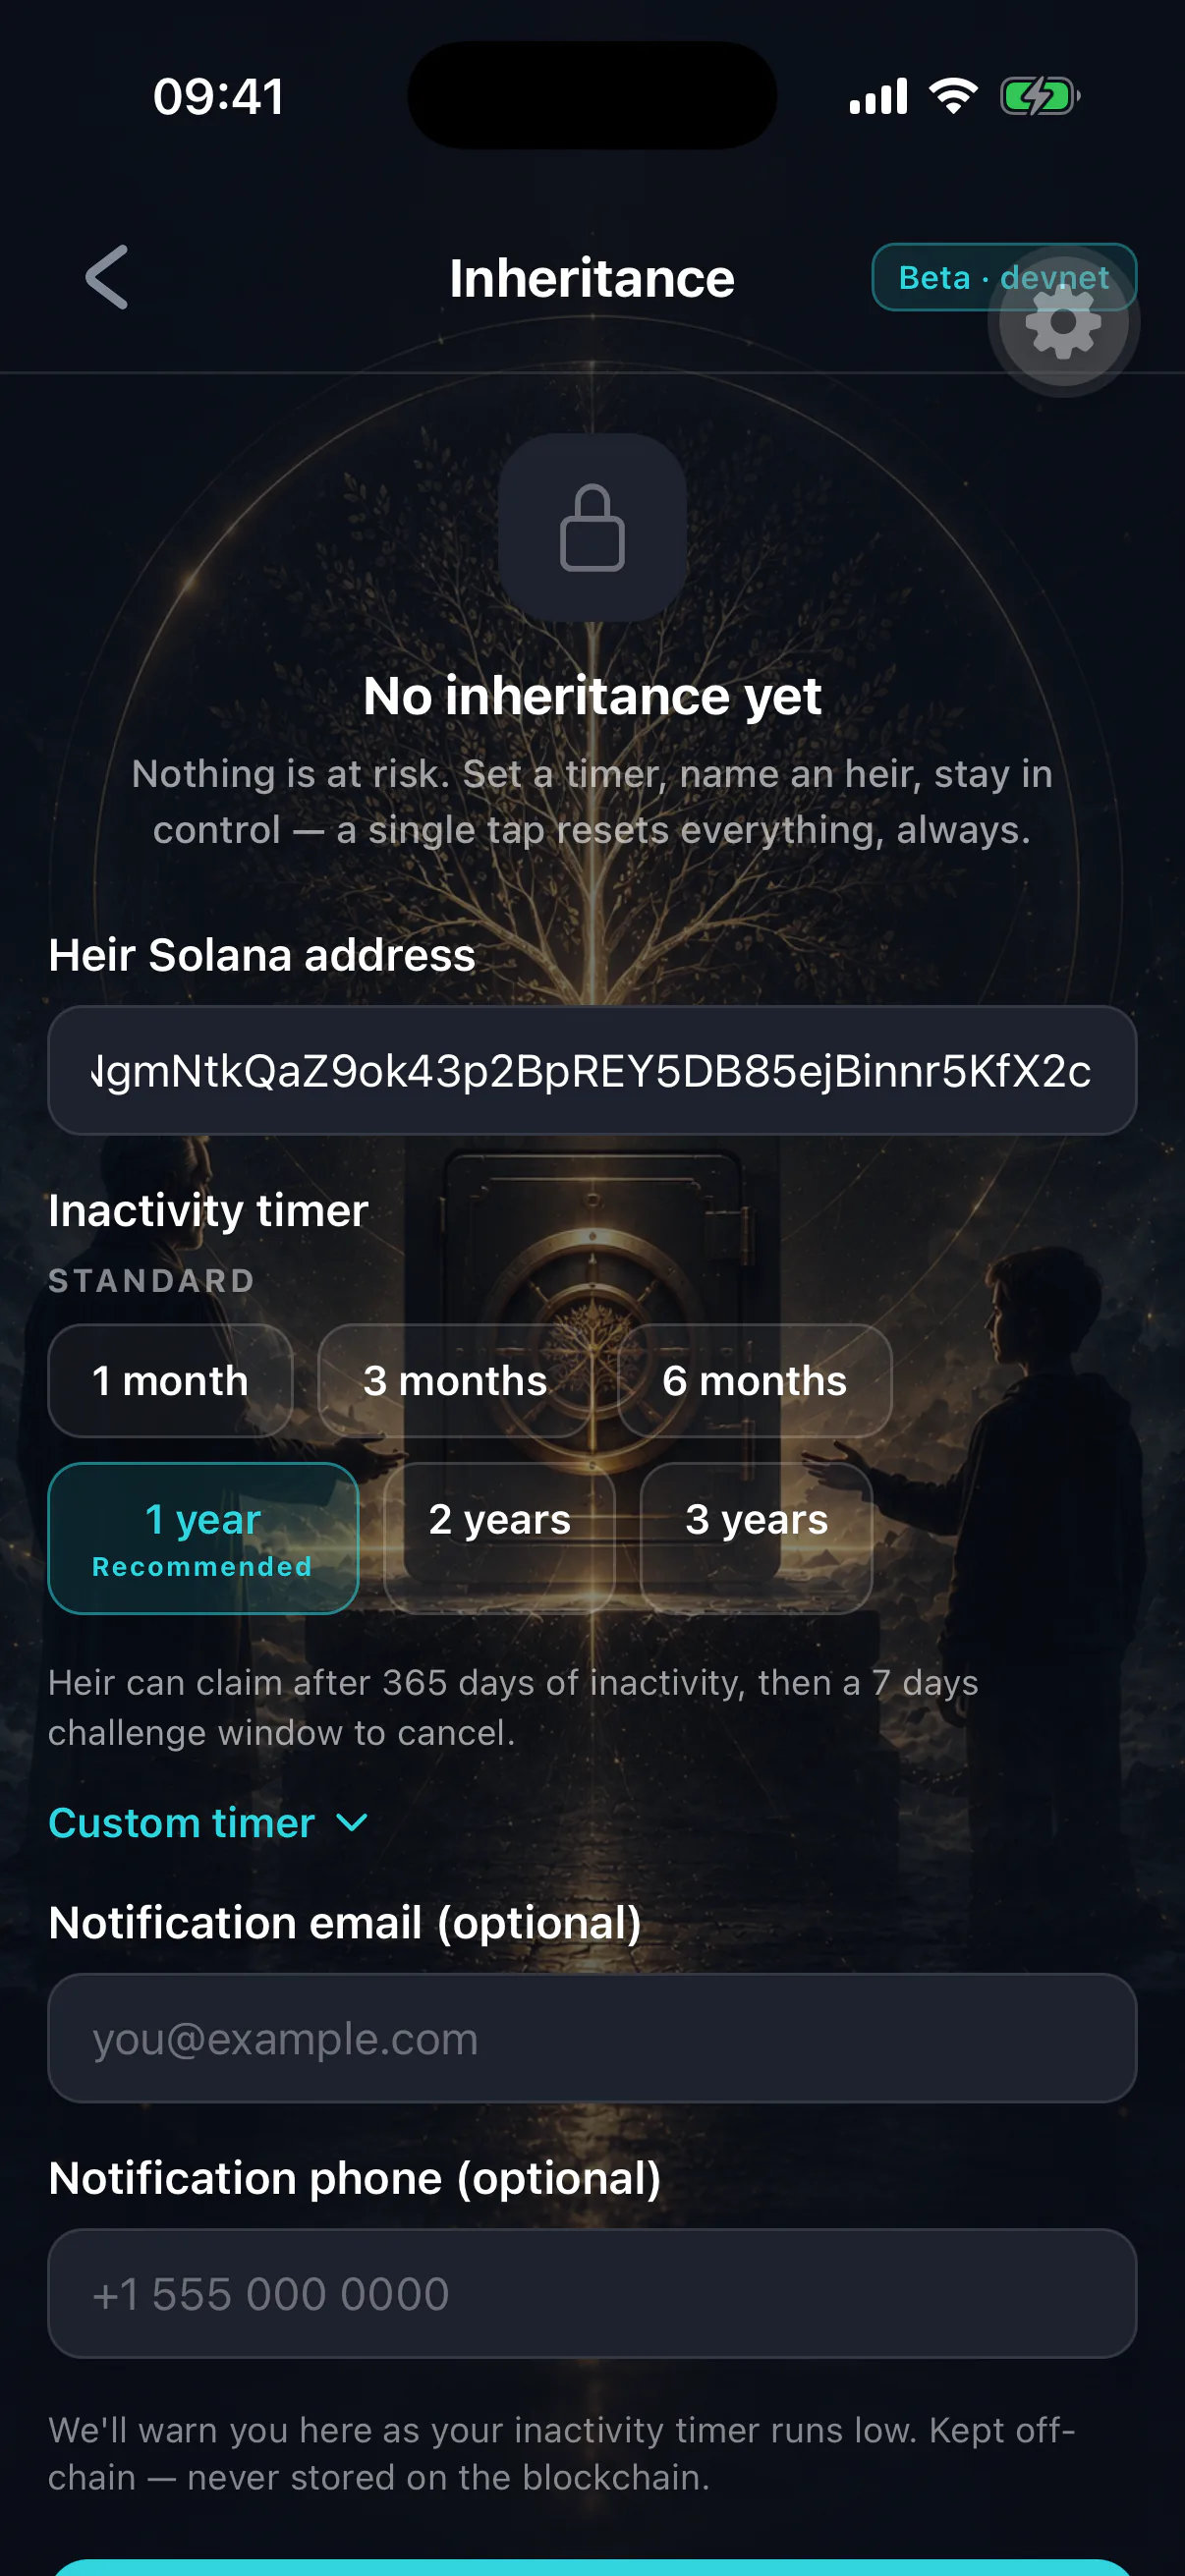
Enter your heir's address
Paste it, or scan their QR code. Check it character by character. See choosing your heir.
- 03
Choose your timers
How long you may be silent, and how long the challenge window lasts. One year and seven days is the recommended pairing. See choosing your timer.
- 04
Approve the setup transaction
This writes the configuration on-chain and starts your heartbeat at the current time. Costs a network fee.
- 05
Have your heir accept
They install the app, open the heir view, and sign a one-off confirmation. Until they do, the switch cannot fire at all.
- 06
Deposit what should pass on
Assets only transfer if they are in the inheritance vault. See depositing assets for your heir.
- 07
Fill the Legacy Vault
The logins, files and instructions your heir will actually need. See adding your first vault item.
- 08
Allow notifications
The warnings before the timer matures are the safety net that prevents an accidental inheritance. See warnings and notifications.
Step five is the one people skip
An heir who has not accepted cannot claim. Ever. If you never complete that step, the estate simply locks up when you die — no transfer, no recovery. Do not consider setup finished until your heir has confirmed and you can see it reflected on your inheritance screen.
Verifying it worked
Your inheritance screen should show:
- The heir address you entered, matching theirs exactly.
- Heir confirmed, after they have accepted.
- A live countdown against your inactivity timer.
- The deposited balance, once you have deposited.
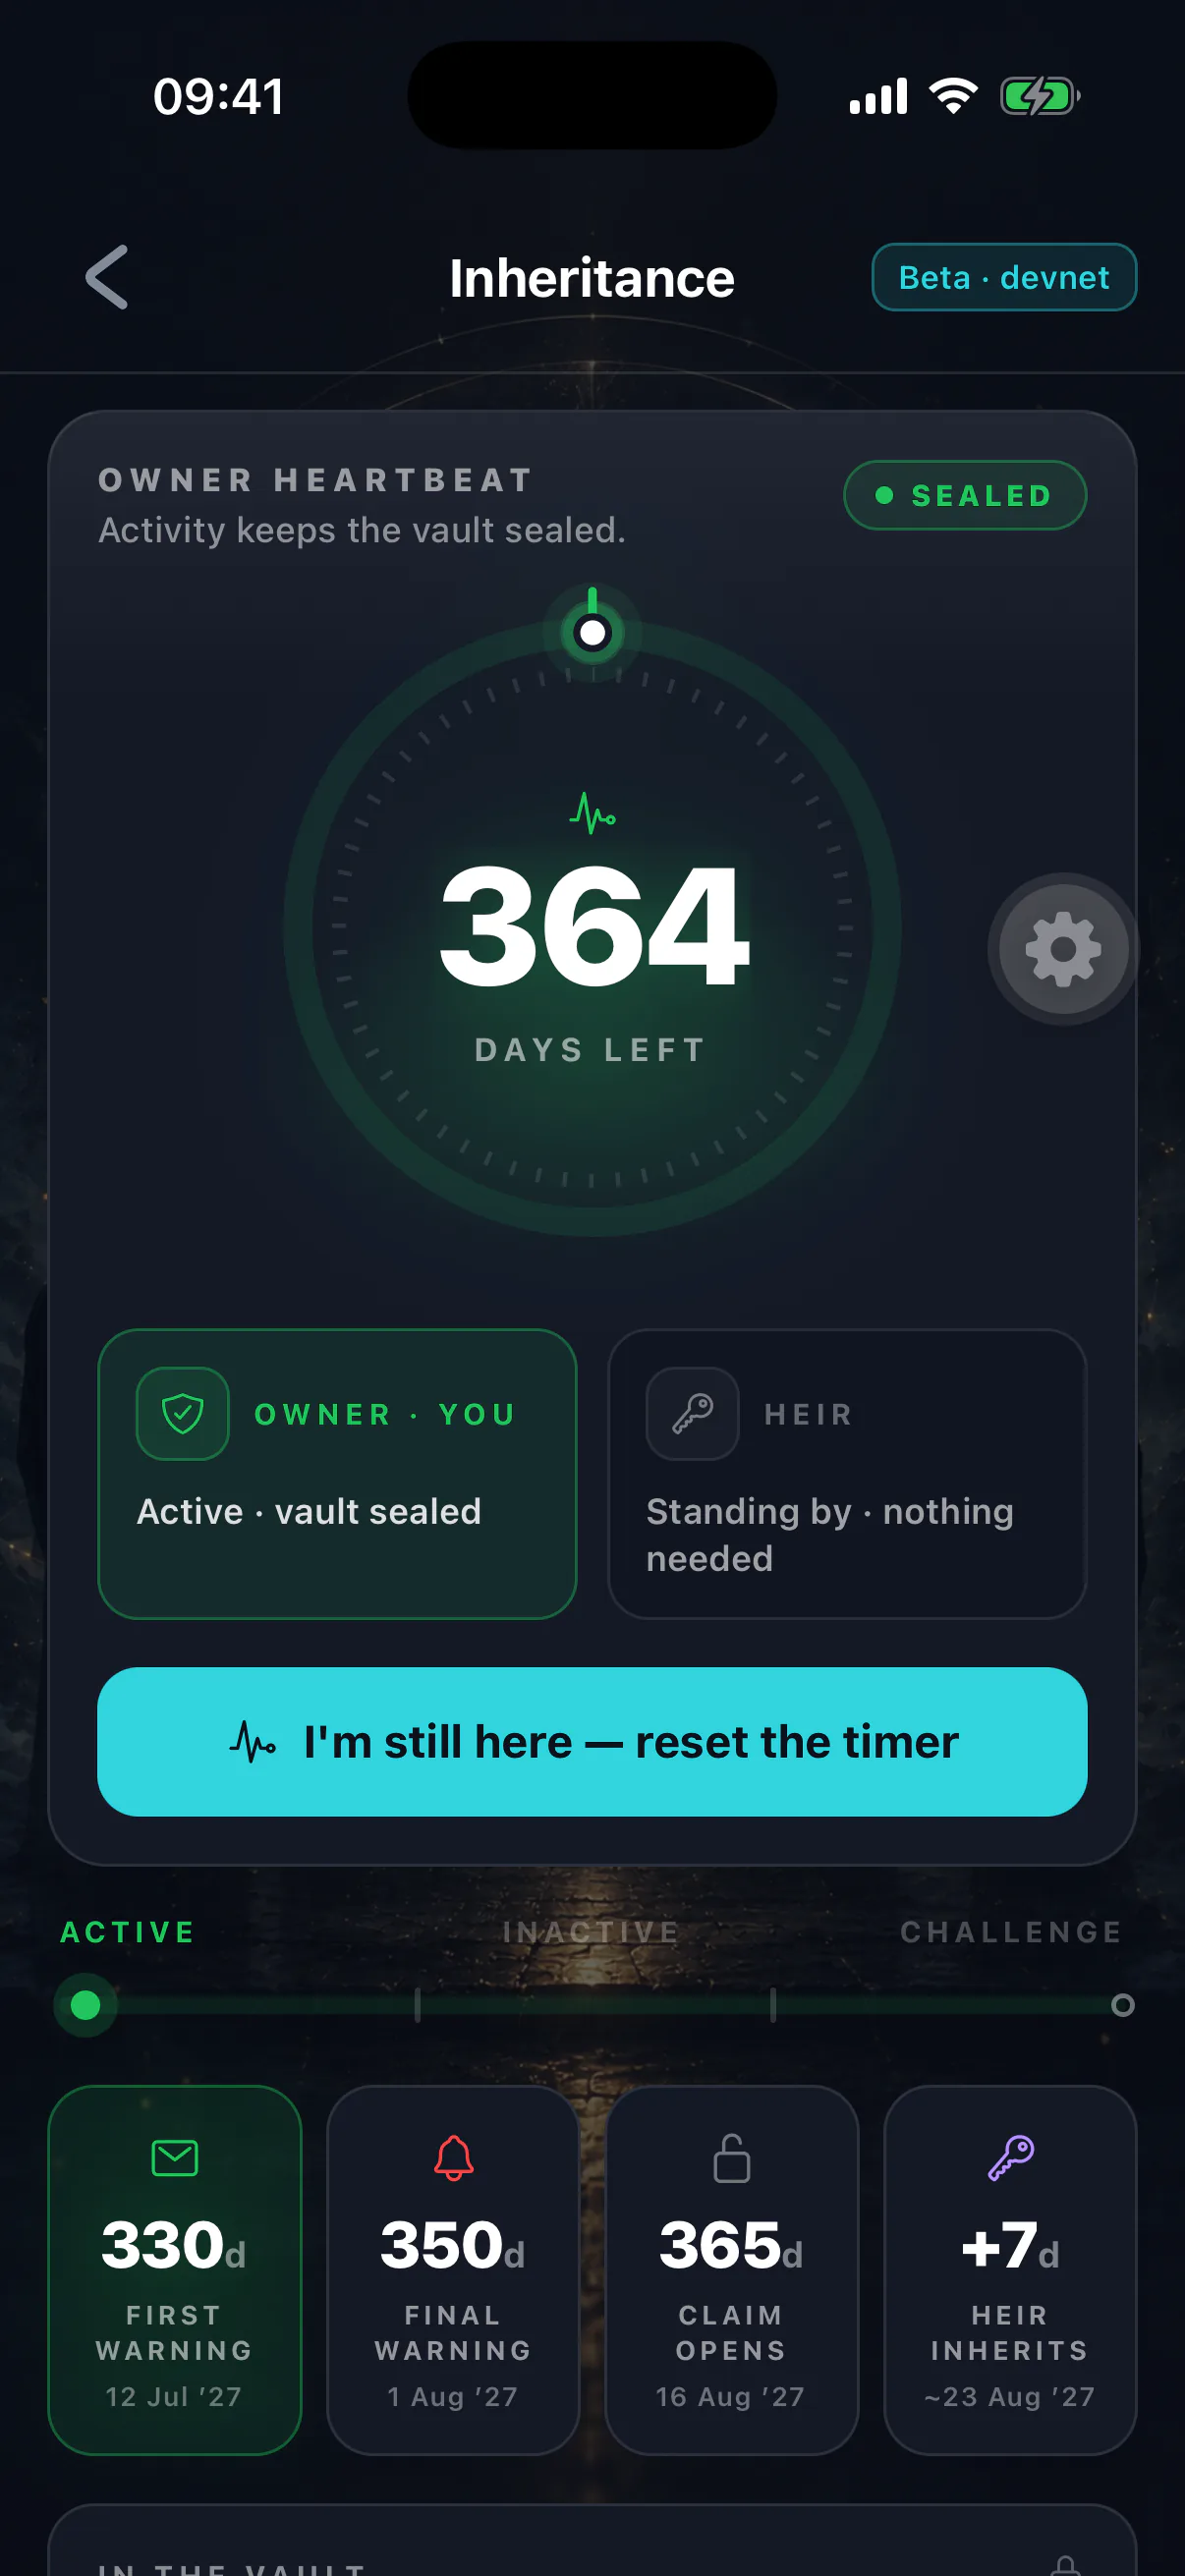
Everything there is read from the chain, so it is the truth rather than a local cache. Your heir sees the same facts from their side.
Changing your mind later
Everything is editable until a claim finalizes: heir, timers, deposits. Changing the heir resets their confirmation, so a new heir must accept in turn. See changing or removing your heir.
During the beta
Inheritance runs against Solana devnet while the lifecycle is proven end to end. Set it up, rehearse it, and use the short testing timers to watch a full claim play out — but do not rely on it for real value yet.